Do you have a project that has stalled? Have you run out of creative steam and feel like you can't make yourself sew? Are you in desperate need of new clothes or just plain wanna sew something to completion? National Costume Finishing Month is for those of us who need a kick in the pants, a boot to the head, or just a fun excuse to finish a costume or three.
Your mission, should you chose to accept, is to complete a costume down to the last stitch within 30 days. It can be of any era, for any reason, be it con, cosplay, faire or SCA, or even *gasp* modern clothing. Work through your stash, buy that fabulous fabric you've been lusting after, or pick up that stalled project and just sew!
What happens if I don't finish within 30 days?
There is no penalty for not finishing... NaCoFiMo is all about jump starting your creativity and letting loose the costuming muse.
What if I finish my project way ahead of time?
That's up to you. You can stop while you're ahead, or if you're like many sufferers of CADD (Costume Attention Deficit Disorder) and you have another costume or three that needs to be realized, you may decide to start another costume. Sew until you can't sew no more!
What's in it for me?
New clothes, for one! Everyone loves new clothes. But just because simply participating in a community effort such as this isn't always enough incentive, we're going to give out made up awards! For being a finalist, you will get one of three lovely banner icons that you can display on your website or LJ info page.
Finalists with one completed costume will recieve a bronze icon banner.
Finalists with two completed costumes will recieve a silver icon banner.
Finalists with three or more completed costumes will recieve a gold icon banner. Bragging rights are included at no extra cost.
Will there be a showcase after all is said and done?
Of course! It's just not up and running yet, but it will be! We also want to encourage you to post pictures of your projects in progress, because everyone loves pictures.
You are going to give National Novel Writing Month credit for this idea, right?
Yep. We totally ganked their idea and decided the costume community needed a similar outlet for pent-up creativity. Thanks NaNoWriMo!
When does it start?
Dec 15 2006 - Jan 15 2007
Why Then?
Most people have some amount of time off of school/work in that block of time, for those of us in the SCA there are few (if any) events.
But that time doesn't work for me!
So come up with your own time period and do it!
Should I wait until Dec 15th to start finishing projects?:
Dude, no. That's what's gotten us all in to this mess in the first place. If you have the time to work on something, do it. It just won't count towards your NaCoFiMo "score" unless it's finished on or after Dec 15th. But YOU will know that you got something done, and won't that feel great? Besides, the more unfinished things you get finished before then, the more space you'll have in your sewing room for other NaCoFiMo projects!
How big does my unfinished costume project have to be?
It doesn't matter. It can be a hem that you've been putting off for two years, or a complete dress that you got cut out but never started sewing. Sure, the latter is going to be pretty impressive when we're all done and put up the spiffy website, but you'll still get your icon/banner/bragging rights.
Now get crackin'!
Friday, December 15, 2006
Friday, December 01, 2006
Dreams of German fashion...

And I dreamt... lol. Oh, how I want a dress like this. In coral or deep red/burgundy silk, black velvet, and a gold-embroidered cream silk inset. ~sigh~ Actually I have no clue what I really want to do with the bust inset. I could make it slashed, as shown in one part of the sketch, or I could embroider it. But I have really no embroidery ideas. Embroidery is something I don't have a whole lot of imagination at...
Now, to figure out how much it would cost to make.
Thursday, November 16, 2006
Finished Blackwork Cuff
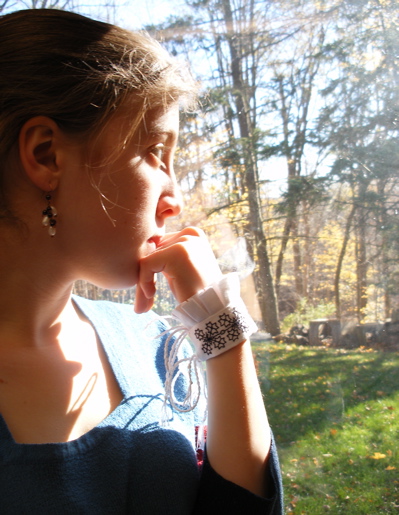
I've finished one of the cuffs! Actually I finished it a while ago but couldn't upload the pics to my computer. So here they are. Boring, I know...
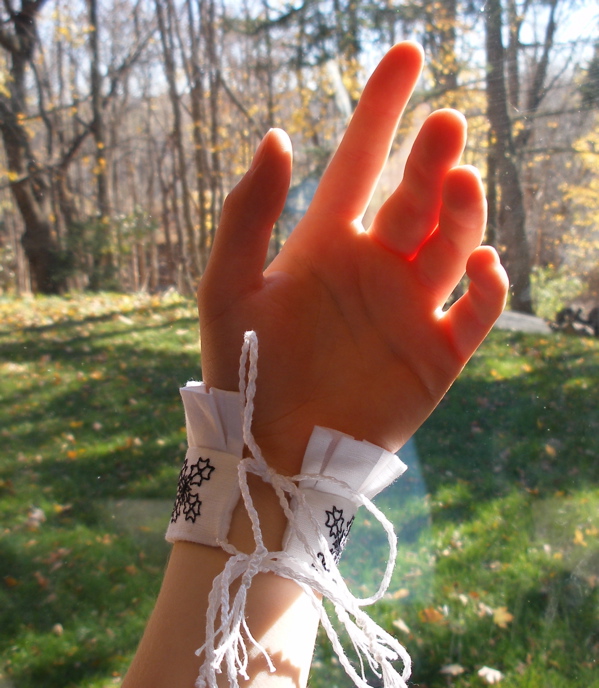
The ties I wove myself, with help from a lovely tutorial that I found onThe Tudor Costume Site. They're white cotton DMC embroidery twist. You can see my box-pleated cuffs in these pics (I am inordinately proud of that box-pleating). The cuff seems a bit thick *sigh* but I think it'll do.
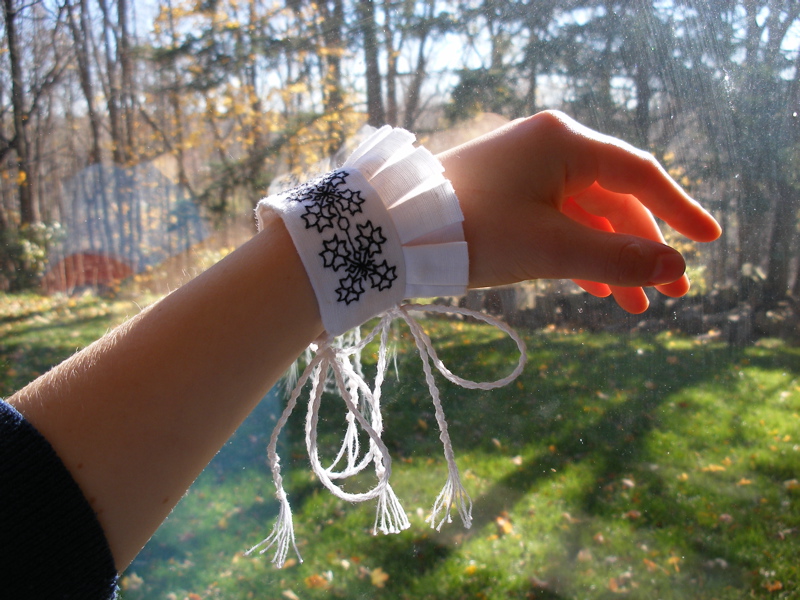
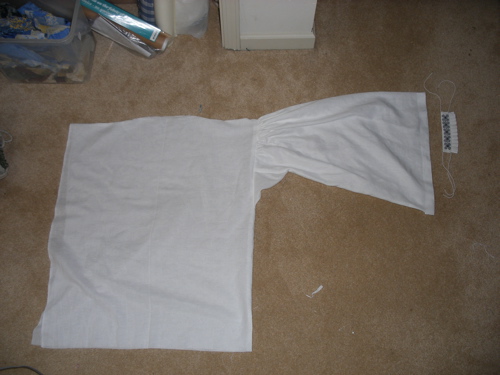
And now, a positively thrilling picture of the shirt so far. This shows how I'm assembling the sleeves/cuffs. I finished the edge of the sleeve, and finished the cuff entirely, and soon (yup, soon) I'm going to cartridge pleat the sleeve into the cuff. I have never before done cartridge pleating, so I haven't done this yet. Chicken, I know. But I will get it done!! I will.
Monday, November 13, 2006
Sture blog
Well, I've made an entirely new blog devoted entirely to the costumes of Svante and Erik Sture. Blogger is so nice, they let you have as many blogs as you please...
Here 'tis, Murder at Upsala Castle, 1567. It's also in my dashboard, under my profile.
Here 'tis, Murder at Upsala Castle, 1567. It's also in my dashboard, under my profile.
Tuesday, November 07, 2006
Doublet Sketches
I'm going to costume a couple of my friends for the play King Richard the III. Both of my friends are guys; I decided against helping out the girls in favour of learning how to costume for a guy. Which is very different from costuming for a girl (although I've found that they're amazingly cooperative - "Stand up, sit down, I need to pin this on you, put your arm up - no, like this...").
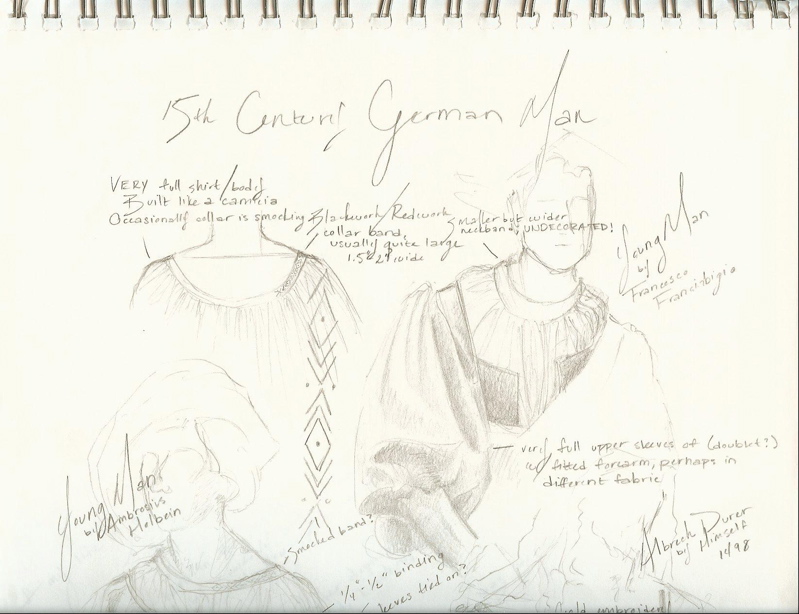
 So... I've been sketching designs, and after attempting to research the men's clothing of the era (well, not the era - I'm not a big fan of the long surcoat things - but rather after. And not English clothing.), I decided against authenticity. Paintings of the most interesting doublets don't show the whole thing!! And there was a particularly interesting one which was black, and therefore nearly impossible to see, which bothered me no end. This is what the sketch below is based off of; A Young Man, by Francesco Franciabigio. It's not very close though, if you look at the upper righthand corner of my first sketch, you can see my idea of the real thing. I added paned sleeves into my design, just to see what it looks like. Personally I find the body to be very boring and rather clumsy. I probably won't use this design. If you have any ideas as to how this thing comes together, please do tell me them, I would be so grateful!
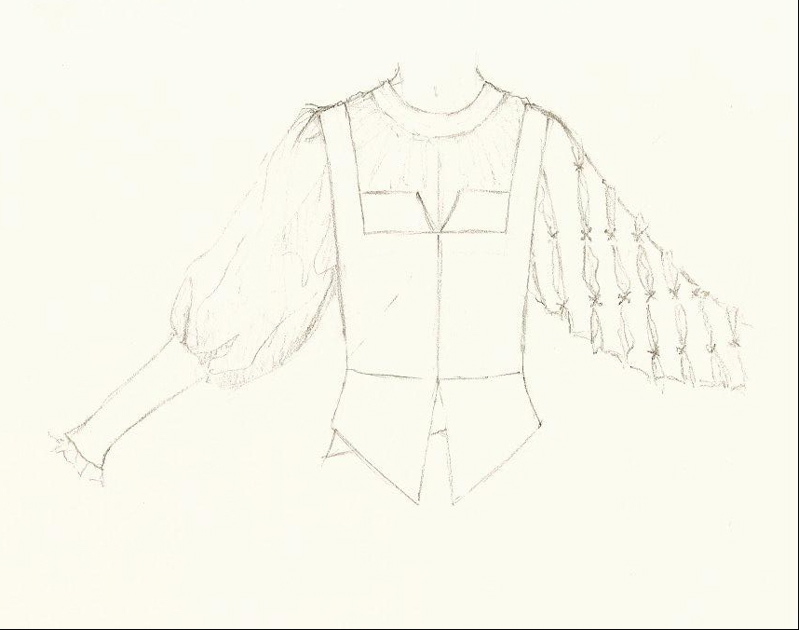
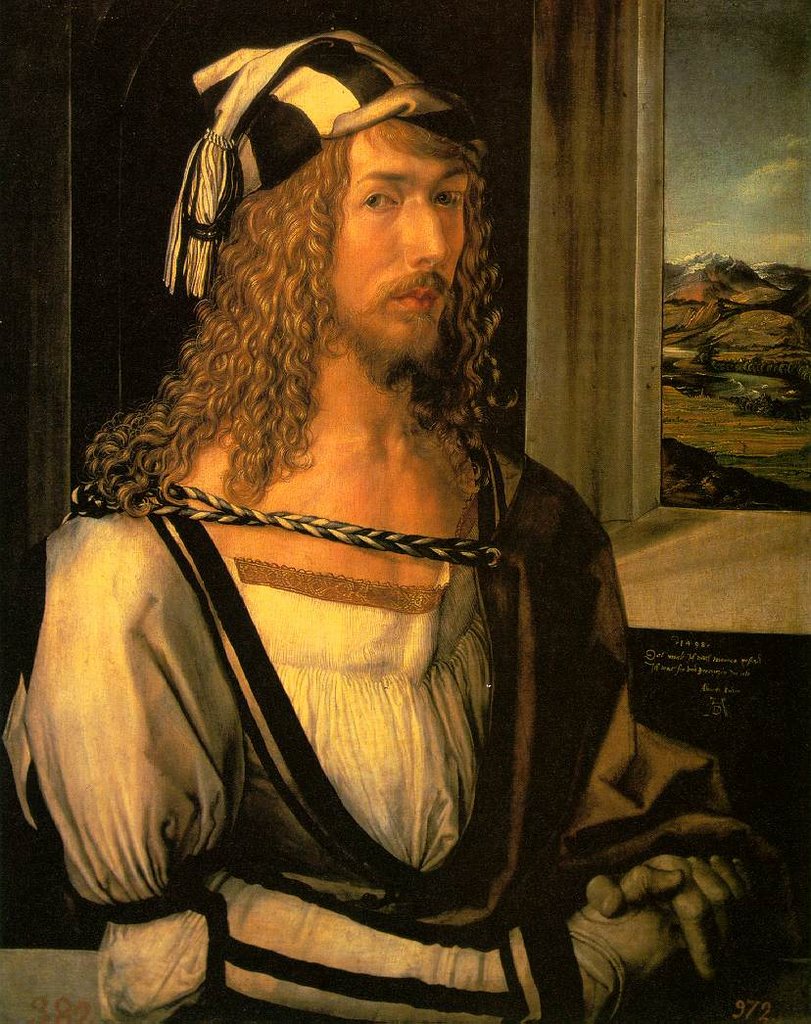 Another doublet from a painting caught my eye, and this was one worn by Albrecht Durer in one of his self-portraits. I find this doublet to be fascinating, especially the sleeves! Unfortunately, the doublet is half obscured by a cape (DIE, thou cape!!!), and the painting is only from the waist upwards, so I have no clue what to do with the bottom. In my design sketch, I tried two different waist treatments, but left the peplum pretty much the same (peplum sounds like a distinctly feminine word, not to be used with a man's doublet!). On the left is a waistline straight across, and only has one fastening, probably some sort of ornate silver hook and eye. On the right, the waistline slants down, enabling a wider fastening, but rather more dorky in this case. Aren't those sleeves awesome?
I'm also playing with the idea of an arming doublet, although I'm afraid my victims wouldn't survive the stage lights. They would just die. But... arming doublets are so cool! I love the idea behind them, and one can do so much with quilting. I may not be able to, but it's a thought.
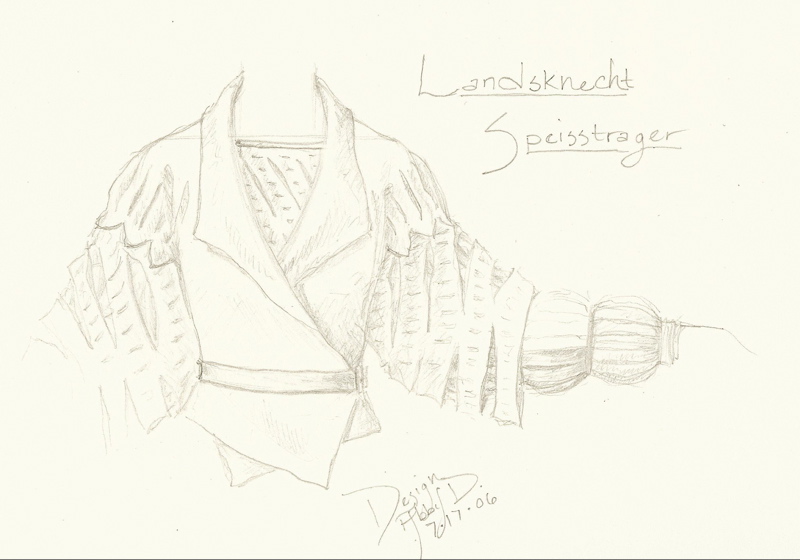
And, again, just a thought, but I love alot of landsknecht (did I spell it right?) doublets. I have no clue how they're put together besides wild guesses, but they're so interesting. This doublet was from an engraving of a Speisstrager solder (some sort of infantry, I think. Or not.) and I really could not figure out how it goes together! It seems like way too many layers for anybody to just walking in, much less marching with who knows how much gear. I changed the bottom half in my sketch.
Yes, yes, I know, All of my doublets should probably have less 'peplum' and more tabs, but I rather prefer this look. Like I said, I'm not really going for authenticity, just something that looks cool. ~winces~ That sounded rather bad, but it is sort of the point. Perhaps I shall try tabs sometime... And now, the bottom half of my sketches of paintings (the top half of which is at the top of this post), including the Albrecht Durer doublet/jerkin.

Wednesday, October 11, 2006
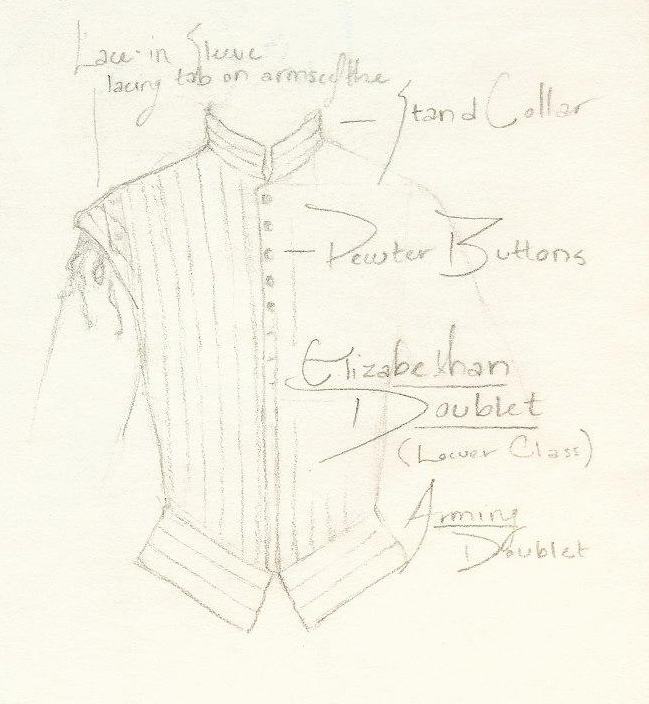
First attempt at Blackwork...
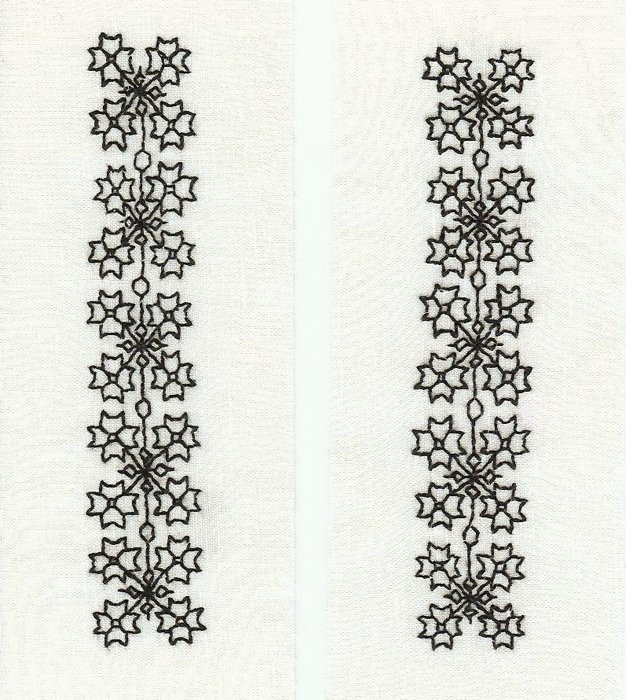

I've finally attempted blackwork! I've been wanting to make an Elizabethan shirt with blackwork on it for a while. Blackwork just looks so spiffy. So, I found a couple of patterns at the Blackwork Embroidery Archives, and I set to work. The one I ended up using is called Quatrefoil (I think this means something like 'four flowers'). Everybody I asked told me to use the leaf pattern for my collar and cuffs, but I love the sharp look of the quatrefoiles. I just finished the cuff stitching about ten minutes ago, so I had to run stick them in the scanner and post!
Thursday, September 28, 2006
Too many things to finish...
I find finishing things to be dreadfully hard.
~sigh~
What I have to finish:
Eowyn Shieldmaiden vest for my friend
Um... like, the entire thing, practically!
1790s corset of pale green ~gasp~ polyester taffeta! ~hides face in shame~
Half the boning channels and then some, eyelets and binding.
Victorian petticoat of white curtain lining. Yep. I was pressed for pennies.
Whipstitch half the waistband down, 1 hook and eye closure
White print Regency gown
Two of the three skirts need to be hemmed. Lol, yes, I have three skirts on that thing - the top one is very see-through! I just added skirts until I couldn't see through it anymore...
Rose-coloured Elizabethan kirtle
One seam to be covered in trim, binding, and eyelets.
Well, that's all I can think of now. And that's just costume projects!!
~wanders off to contemplate the meaning of Life~
Tuesday, September 26, 2006
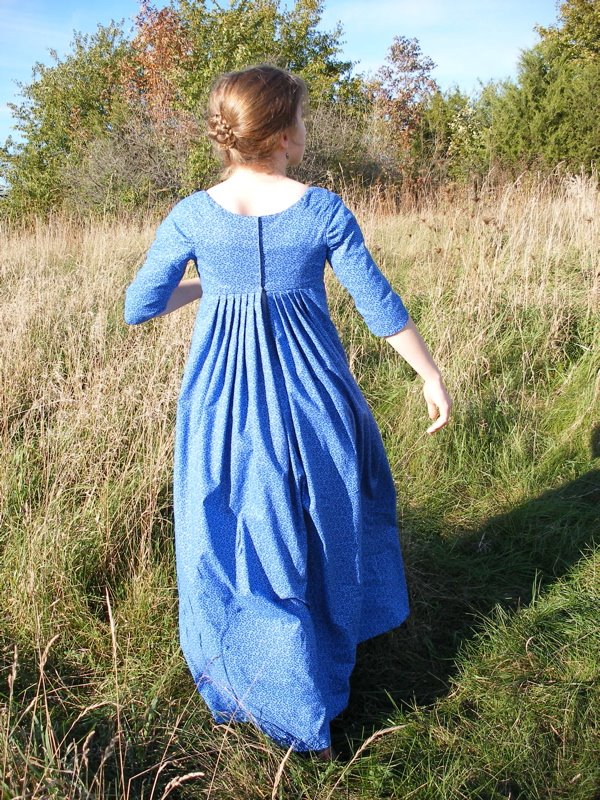
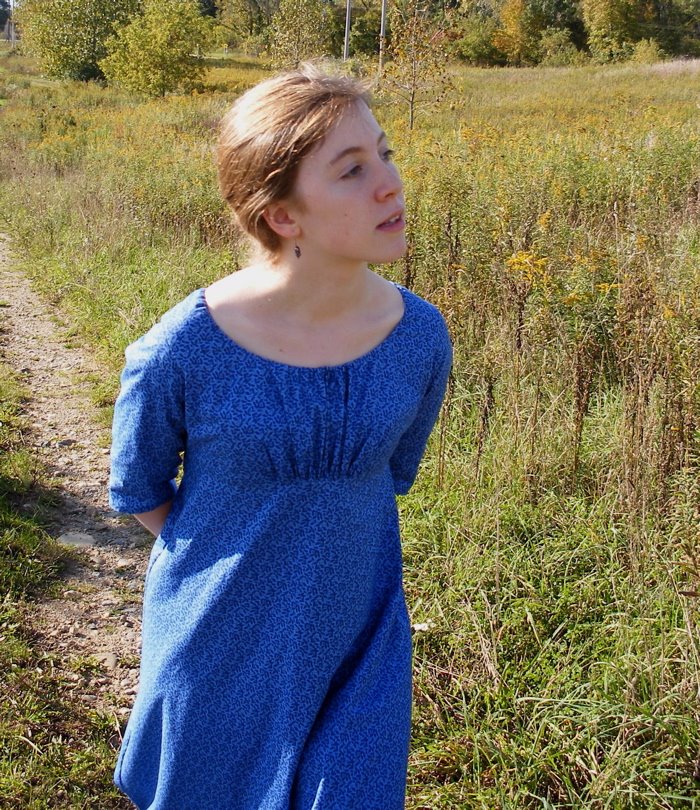
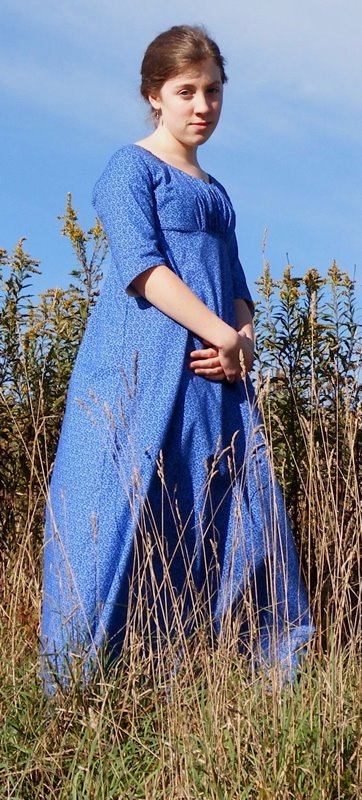
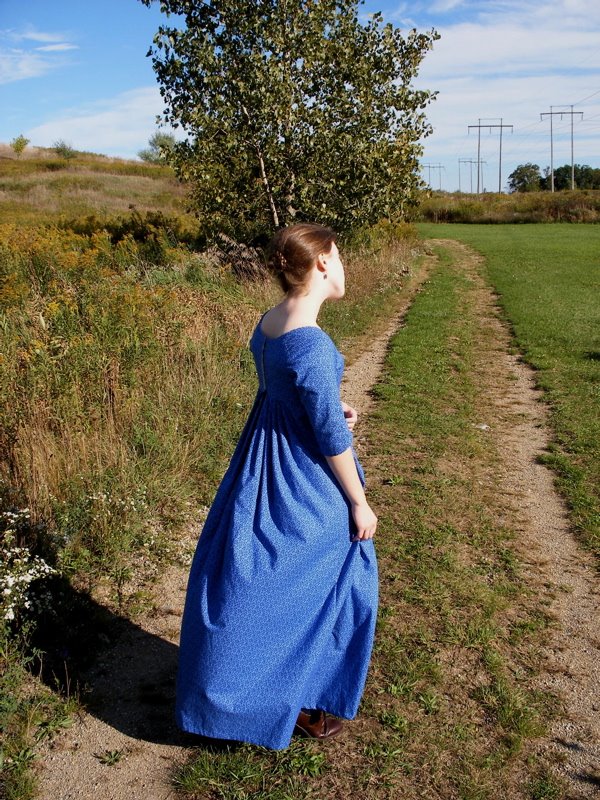
1807 Regency Gown pictures
It is done! Finally. Actually, the making of the dress didn't take a particularly long time... it's just the times in between that sort of stretched out the making! lol
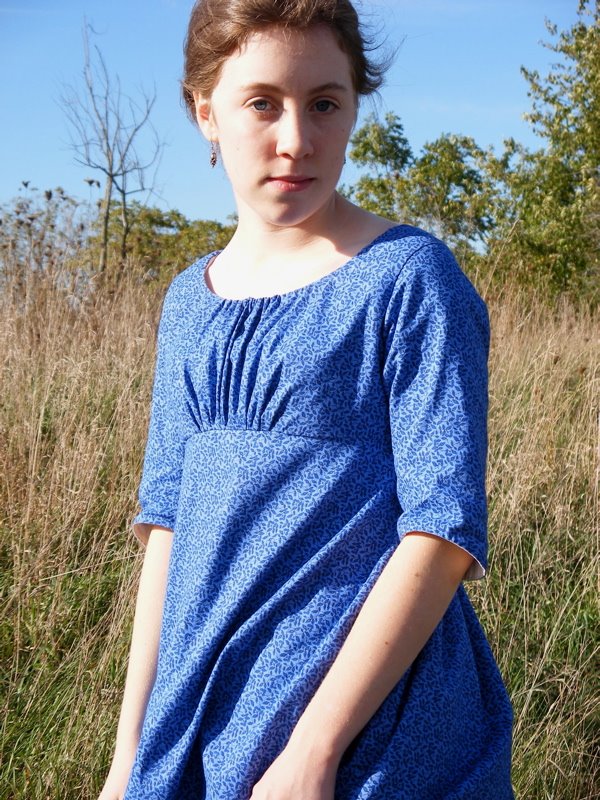
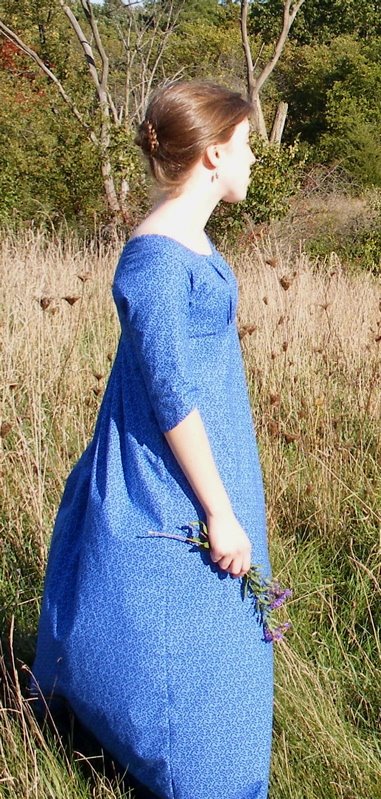 The dress is made up of blue print cotton, with a cream linen lining. The bodice lining is fitted, with two darts on each side. The skirt lining reaches only to my knees in the front, and is about a foot longer in the back.
 There is hand-sewn topstitching everywhere! Around the bottom edge of the sleeve, on both sides of each side-back seam, along the back neckline and shoulders... I think that's all of it. On the linen skirt-lining, instead of making a regular hem, I turned it under by 1/8" twice, and toptstitched it by hand. I also topstitched next to the dart seams. Yes, I was having fun topstitching... it's one stitch that I know I can do, and I got a bit carried away. But it does look nice and tidy, I think!
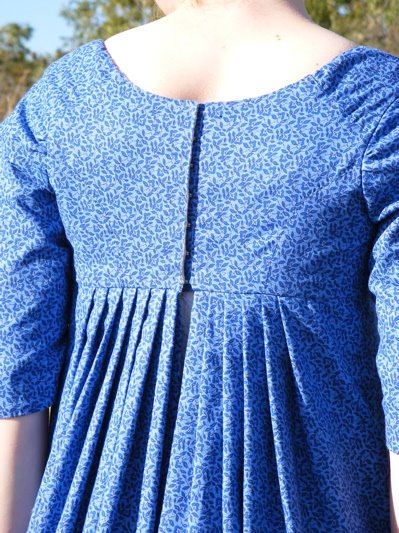 The back closure is hook-and-eye. This is the first time I have attempted a hook-and-eye closure and I am inordinately proud of it (or, I will be once I fix that horrid gap on the bottom!). There are seven metal hooks, and seven handsewn thread eyes. I made the eyes by sewing a 'bar' with a buttonhole stitch over six loops of thread. Tell me if that doesn't make sense! It was really quite easy.
 And now, I shall let the pictures speak for themselves (because I can't think of anything else to say). Except: I am wearing a corset and shift, as you may be able to tell. The shift kept peeking out at the neckline, which was rather a nuisance.
Friday, September 08, 2006
Big Hair
 The last couple of weeks, I've been rather obsessed with the dress and hair styles of the 1780s/90s (obsessed enough to start a corset for it!). I really want to make a chemise dress, but if I'm going to wear it, I need the hair. Yes the big poufy hairdo. Definitely a requirement.
 So, this morning I enlisted the aid of my sister, and we set about curling my hair with hot-rollers. First, I dampened my hair with water and put a bit of gel in it (it seemed like a ton of gel to me, but I rarely put gel in my hair, so perhaps it wasn't so much). Then we put as many hot-rollers as possible in my hair, clipping them with little plastic hairclips where the metal pins wouldn't hold them in place. About half the metal pins refused to hold up their rollers, naturally.
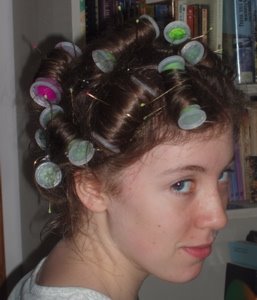 I wandered about the house looking quite ridiculous for, oh, two and half hours. Somewhere in that time I misted my hair with a water spray-bottle and tried drying it with the hairdryer - an attempt to be sure that my hair would curl! After two and a half hours, I could no longer wait, and pulled out all the hot rollers and clips. The immediate results were not particularly promising... BUT, I just started piling my hair on top of my head and stabbing clips and bobbypins into it.
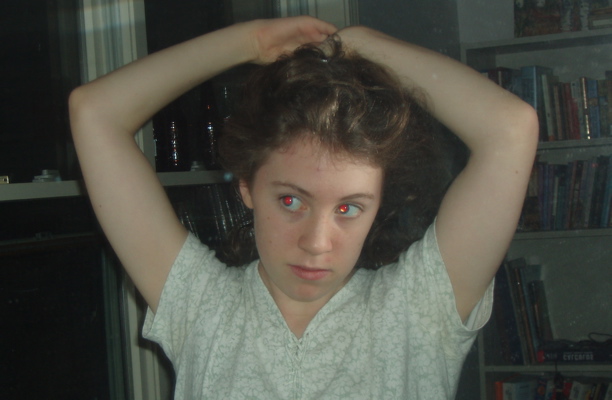
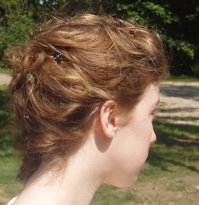
Success!! Well, it's not quite as big as I wanted - but I did manage to lift my hair a smidgen higher by sticking my fingers under it and tugging on it.


It has begun!
Well. Now I have a blogger - thing. This will be an account of my adventures in costume (may they be many). Now if I can just figure out how it all works...
Subscribe to:
Comments (Atom)